

Create and activate your first Playbook
Your first Playbook is where a trading idea becomes something TensorAlgo can monitor and review consistently.
You do not need to start with the most advanced configuration. A good first Playbook should make one setup clear enough that you can understand what TensorAlgo is looking for and what evidence appears afterward.
Choose the starting path that feels easiest
Open Settings → Create Playbook. TensorAlgo gives you three ways to begin:
- AI Playbook Builder — describe what you want to trade and let TensorAlgo assemble an editable first version from supported Strategy Blocks;
- Starter Templates — choose an editable example and adapt it to your idea;
- Build Manually — start from scratch with direct control over supported conditions, sequences, confirmations, context, and execution settings.
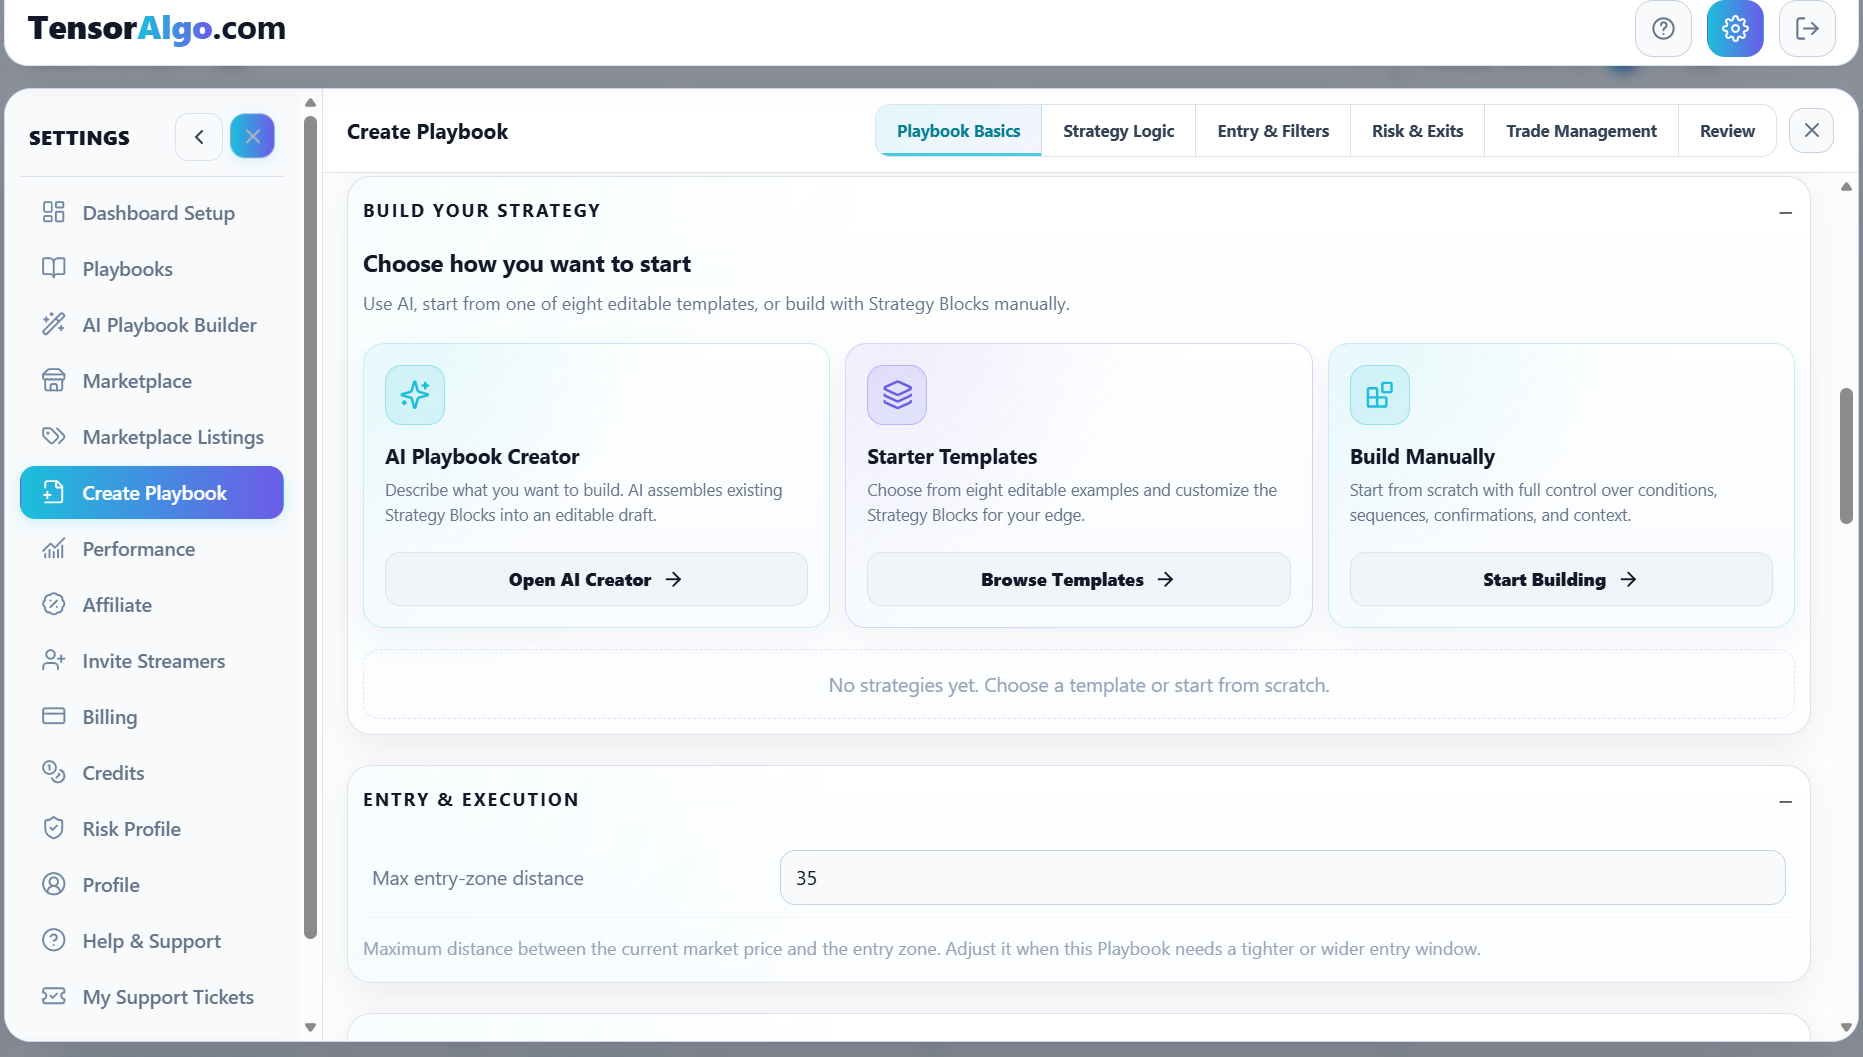
For a first Playbook, choose the path that gets your idea into a structure you can understand. You can build more complex Playbooks later.
Define the market and basic identity
Give the Playbook a clear name and choose the supported instrument it belongs to. A descriptive name is useful later because Trade History and Trade Intelligence Center can tie evidence back to the Playbook.
If you build manually, work through the builder tabs rather than trying to configure everything at once:
- Playbook Basics
- Strategy Logic
- Entry & Filters
- Risk & Exits
- Trade Management
- Review
The tabs give you a natural path from the strategy idea to the final validation state.
Add the strategy logic
A Playbook needs at least one valid supported strategy before it can be meaningfully activated.
For a manual build, use supported Strategy Blocks to describe the setup structure. For an AI-generated Playbook, the builder creates the first supported strategy for you. Starter Templates already give you an editable starting structure.
The important part is that the strategy matches the idea you intended—not that you use the largest possible number of conditions.
Review entry, exits, and management
Playbook-level settings let you shape how a valid setup should be turned into a trade plan. Depending on the configuration, you can review values such as entry-zone distance, stop-distance boundaries, target structure, risk/reward handling, break-even behavior, and managed-stop preferences.
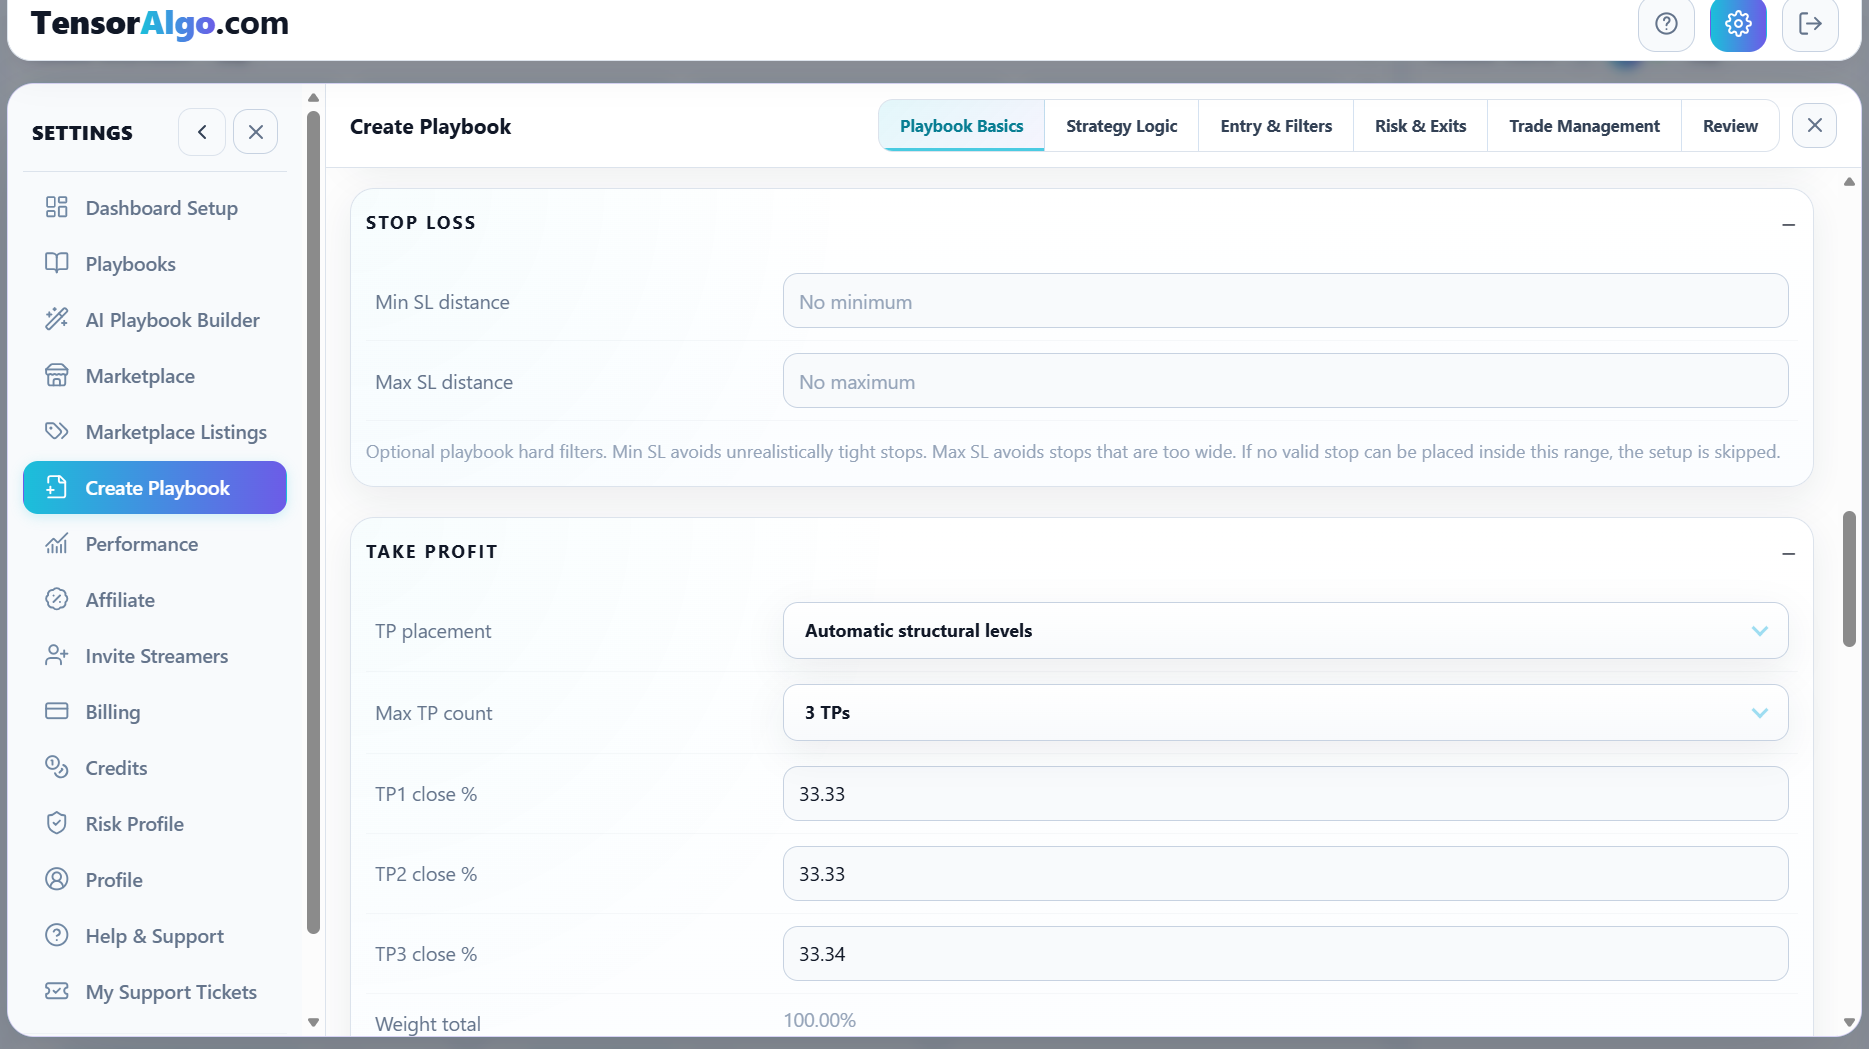
For your first Playbook, keep the settings understandable. You can refine them later when Trade History gives you more evidence.
Use Review before activation
The Review area summarizes the configured strategy and execution settings and shows builder checks that need attention.
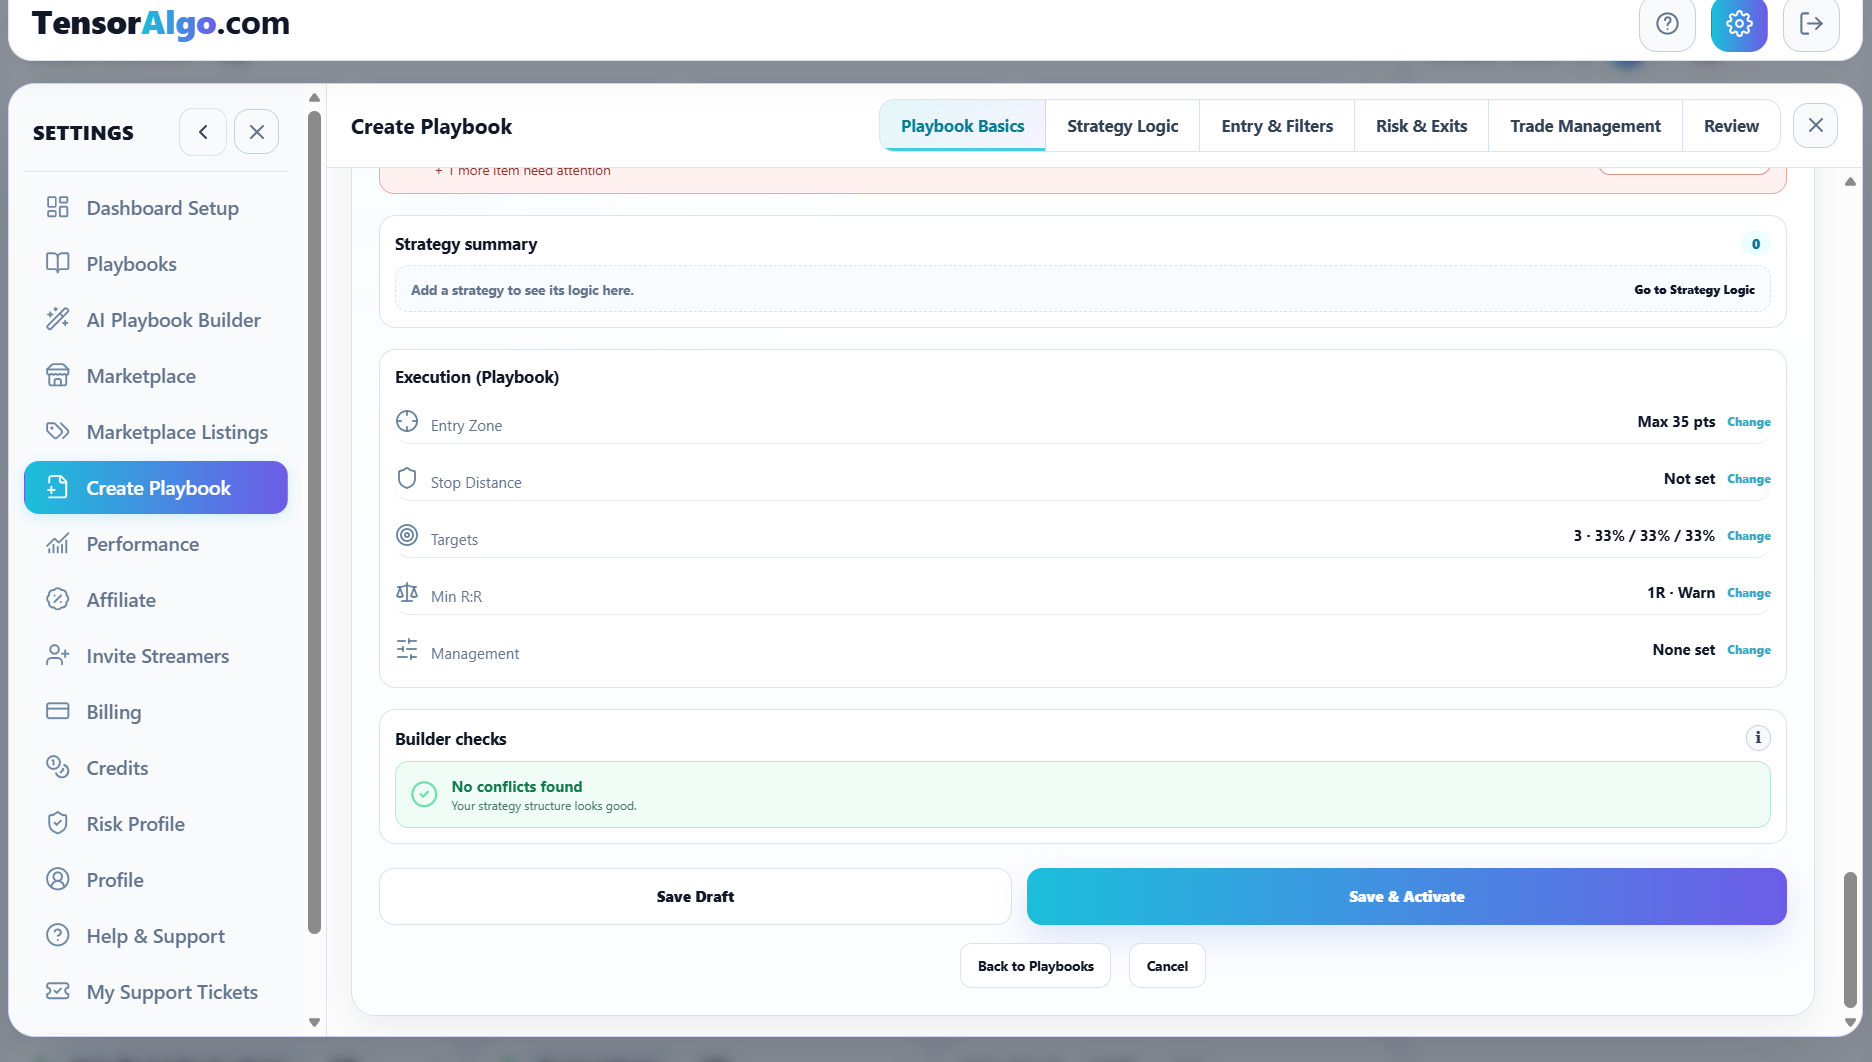
If something is incomplete, use the review message to return to the relevant section. Correcting the structure before activation is easier than guessing why a Playbook did not behave as expected later.
Save Draft or Save & Activate
Choose Save Draft when you want to keep the Playbook but are not ready to evaluate it yet.
Choose Save & Activate when you want TensorAlgo to save the Playbook and activate it immediately if validation and account limits allow.
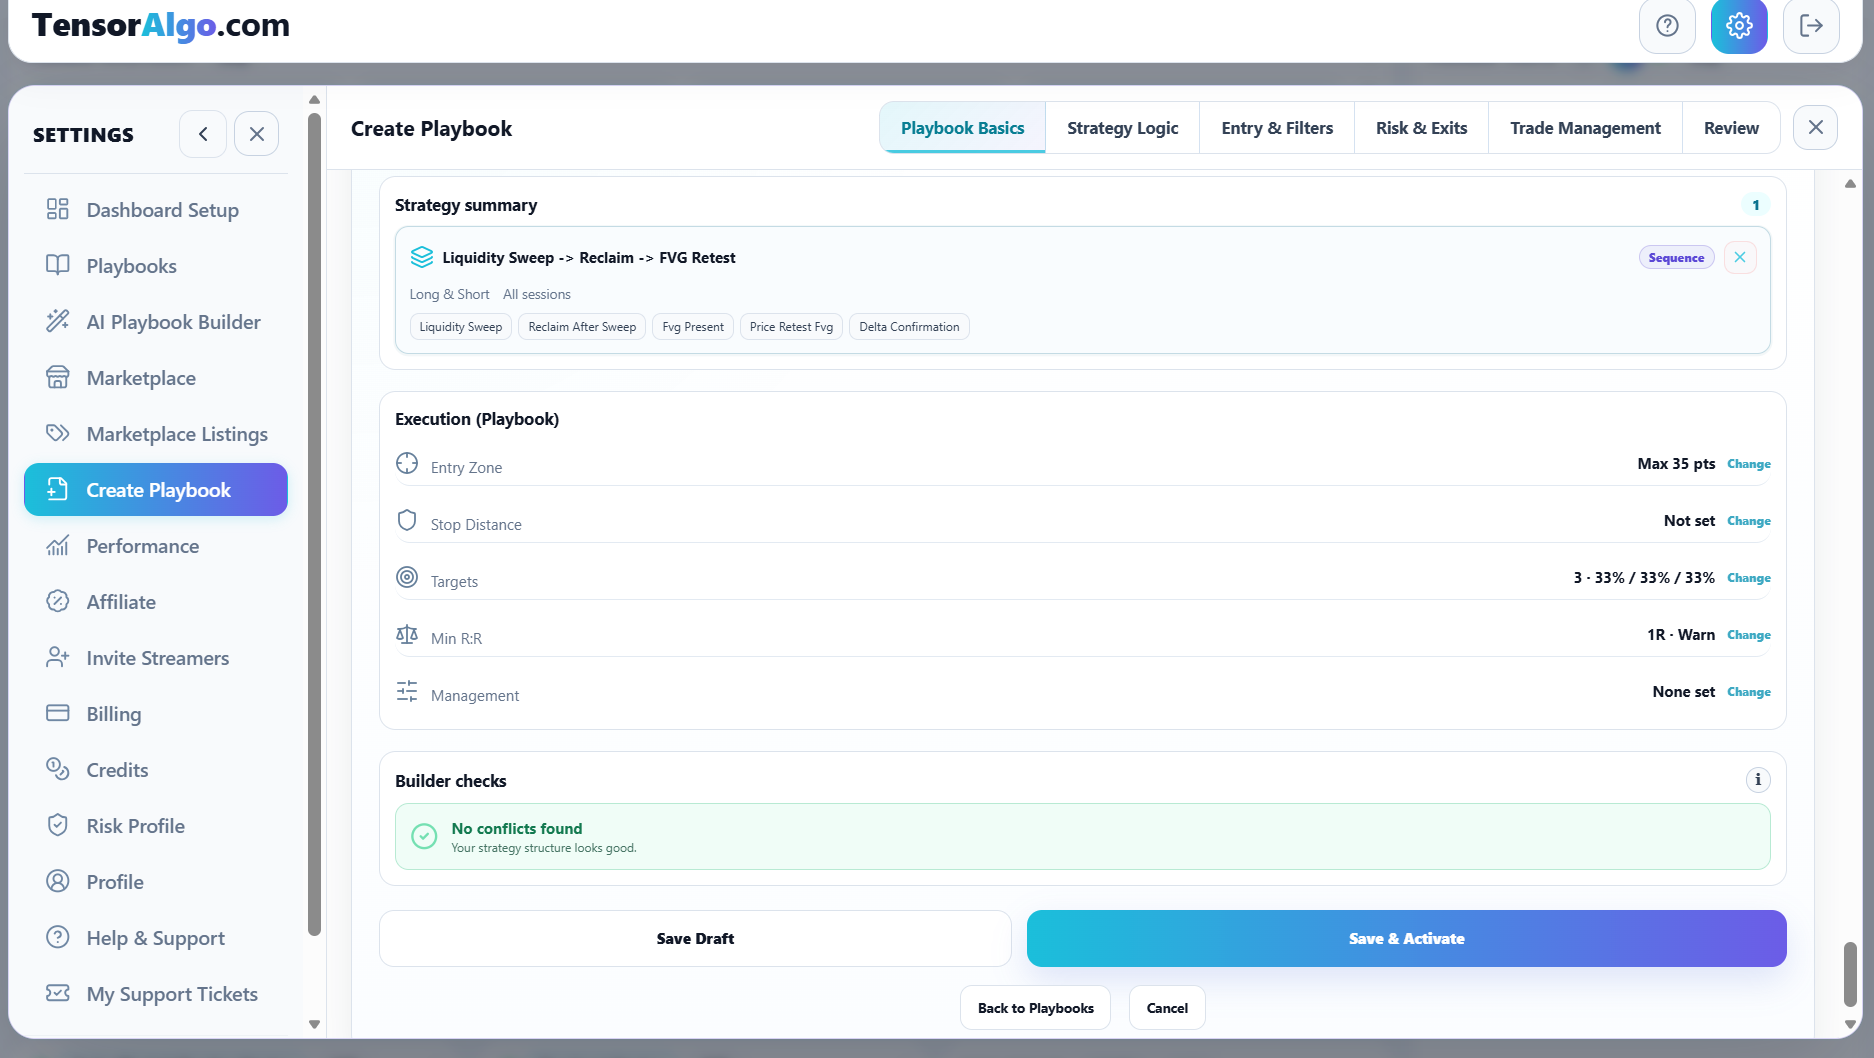
You can also activate a saved Playbook later from Settings → Playbooks.
What happens after activation
An active Playbook participates in supported market evaluation. Matching setup and lifecycle information can appear through dashboard features such as Playbook cards, Trade Tape, and Trade History.
That recorded history is where the Playbook becomes useful for improvement: you can later review which setups worked, which did not, and how the Playbook contributes inside Trade Intelligence Center.
If Save or Activate is unavailable
Check these items after you have reviewed the Playbook itself:
- confirm that the Playbook has a valid name, instrument, and supported strategy;
- resolve any builder validation message;
- check whether the account has room for another saved Playbook;
- check whether the active-Playbook or active-strategy limit has already been reached;
- confirm that trading access for the account is currently available.
If the Playbook saves but cannot activate, you do not need to rebuild it. Keep the saved version, resolve the capacity or validation issue, and activate it afterward.